更新
apt update -y && apt dist-upgrade -yapt-get update && apt-get install vim lrzsz unzip net-tools curl screen uuid-runtime git -y && apt dist-upgrade -y修改IP地址
由于Proxmox是基于Debian的底层,所以我们可以修改配置文件来更改IP,一共要更改三个。
一、在局域网的电脑浏览器输入PVE的IP地址登录后台,从左边的菜单找到“PVE—_Shell”菜单,进入网页版的ssh界面下或者用xShell进入主机,输入root密码后登录到ssh下。
二、输入以下命令回车:
vim /etc/network/interfaces
会出现类似下面的配置文件
auto lo
iface lo inet loopback
iface enp2s0 inet manual
auto vmbr0
iface vmbr0 inet static
address 192.168.1.2
netmask 255.255.255.0
gateway 192.168.1.1
bridge_ports enp2s0
bridge_stp off
bridge_fd 0
建议只修改address,netmask和gateway这3个配置值即可,含义分别是IP地址,子网掩码和网关地址。
vi /etc/issue通过键盘上下左右移动到https://这行的IP地址,按一次i进入修改状态,修改为新的IP地址,端口8006不要改,修改完成确认无误后按一次ESC键输入“:wq”回车保存退出。
四、输入以下命令回车:
vi /etc/hosts通过键盘上下左右移动到第2行的IP地址,按一次i进入修改状态,修改为新的IP地址,修改完成确认无误后按一次ESC键输入“:wq”回车保存退出。
五、reboot,重启PVE!
如果更新时出现错误 E: Sub-process /usr/bin/dpkg returned an error code
参考:https://blog.csdn.net/yusiguyuan/article/details/24269129
apt-get update --fix-missing
apt-get autoremove && sudo apt-get clean && sudo apt-get install -f
如果更新时出现错误 You are attempting to remove the meta-package 'proxmox-ve'
参考:https://forum.proxmox.com/threads/apt-get-dist-upgrade-wants-to-remove-proxmox-ve-pve-firmware.39360/
#Yes, I've tested it. I can remove any kernels listed with this command:
#列出当前系统的Linux镜像
dpkg --list | egrep -i --color 'linux-image|linux-headers'
#Then:
#删除旧的Linux镜像
apt-get --purge remove linux-image-4.9.0-4-amd64 linux-image-4.9.0-5-amd64
#更新grub
update-grub
解决locale: Cannot set LC_CTYPE to default locale: No such file or directory报错
参考文章:https://www.cyberciti.biz/faq/os-x-terminal-bash-warning-setlocale-lc_ctype-cannot-change-locale/
# localedef -i en_US -f UTF-8 en_US.UTF-8
添加硬盘做存储
PVE安装后会默认将系统盘分出local和local-lvm,但有时还需要别的硬盘作为虚拟主机的数据盘,所以就需要添加硬盘进行扩充。
一、硬盘分区、格式化
首先需要先先看下需添加硬盘的设备名称,如下图的/dev/sda(当然也可以在命令里用fdisk -l去确认)
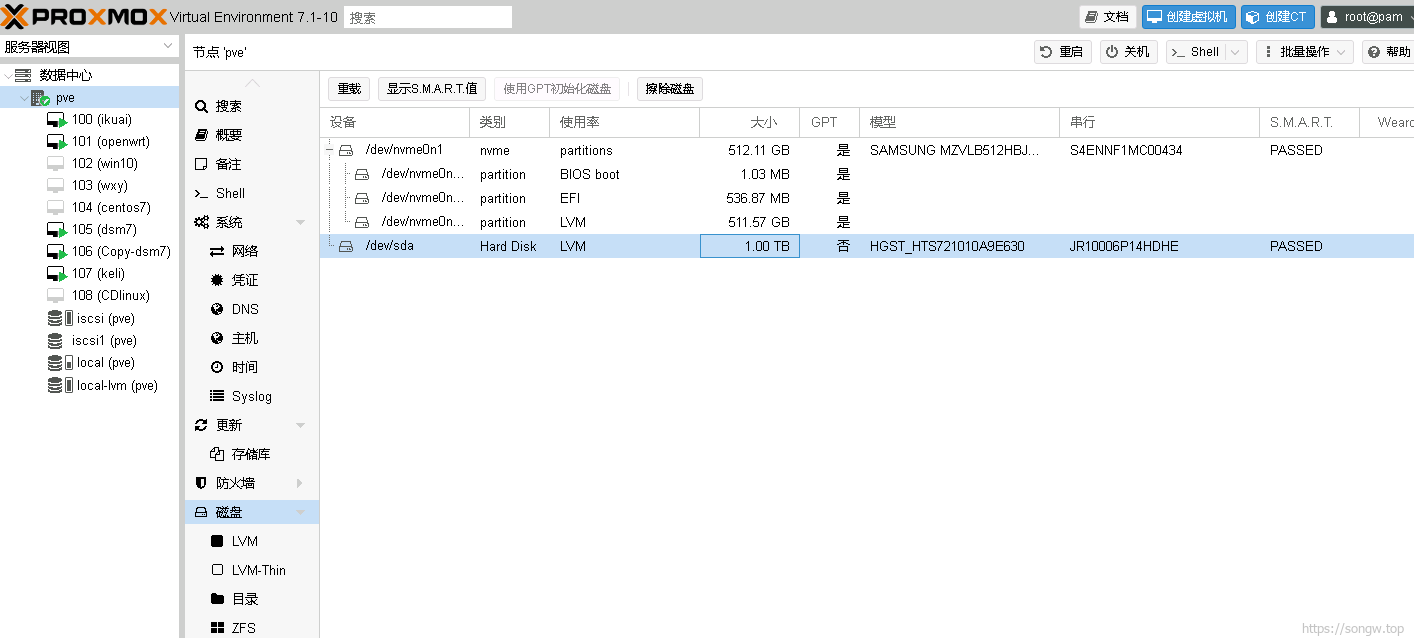
确定好名称后打开Shell,输入
fdisk /dev/sda这里的操作就跟Linux没什么区别了,分区格式化
先分区:输入n(分区) - 输入p(主分区) - 输入w(写入分区)
格式化(格式化为ext4格式):
mkfs -t ext4 /dev/sda1创建/mnt/sda1目录:
mkdir -p /mnt/sda1将/dev/sda1分区挂载在/mnt/sda1上:
mount -t ext4 /dev/sda1 /mnt/sda1将/mnt/sda1挂载写入到系统启动项:
echo /dev/sda1 /mnt/sda1 ext4 defaults 1 2 >> /etc/fstab挂载硬盘:
选择“数据中心”,存储 - 添加 - 目录
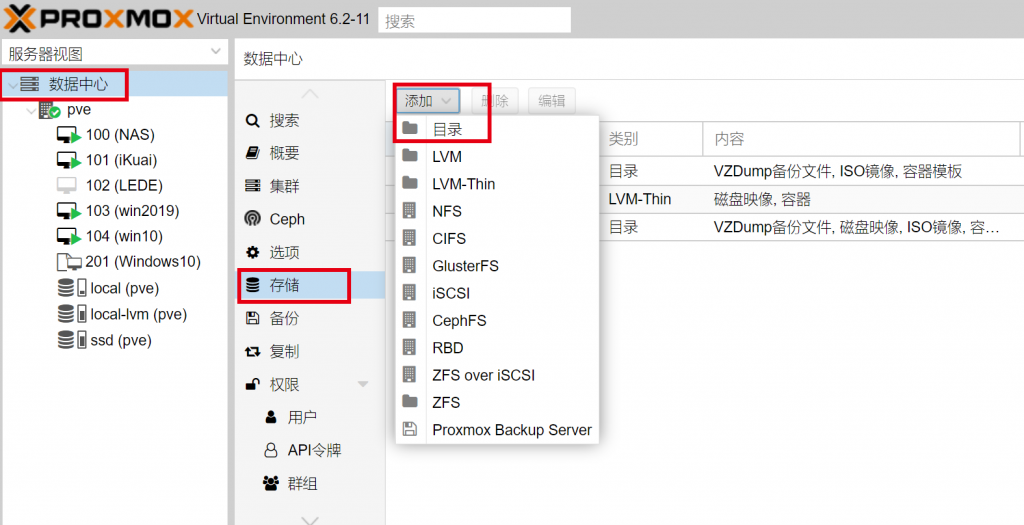
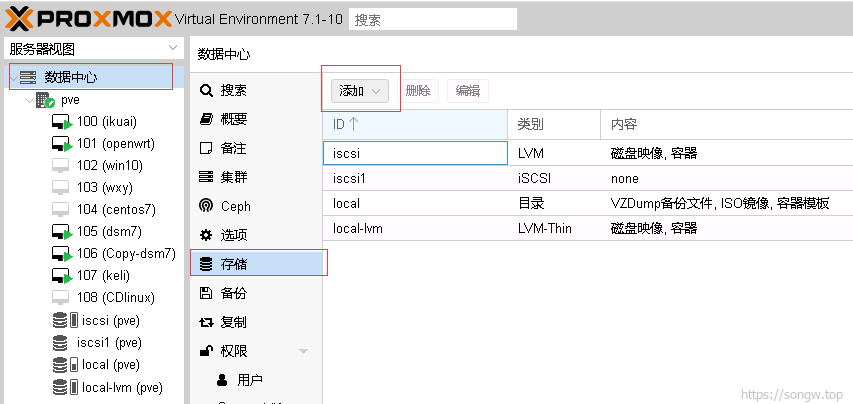
ID可以随便填,目录就是刚才创建好的/mnt/sda1,内容全选,其它默认,点击添加;/dev/sda这块硬盘就添加完毕了,稍等几秒钟就可以在节点里看到硬盘
配置国内软件源
默认是企业订阅版,如果不做修改,在使用 pveceph init 进行 ceph 初始化安装的时候会将整个环境破坏,切记!
登陆各节点Shell控制台
【重要】将/etc/apt/sources.list.d/pve-enterprise.list 文件内的唯一一条记录注释掉:
echo "#deb https://enterprise.proxmox.com/debian/pve bullseye pve-enterprise" > /etc/apt/sources.list.d/pve-enterprise.list mv /etc/apt/sources.list.d/pve-enterprise.list /etc/apt/sources.list.d/pve-enterprise.list.bak # 重命名也可【推荐】 rm -rf /etc/apt/sources.list.d/pve-enterprise.list # 删除也可PVE 6.x:
cat > /etc/apt/sources.list <<EOF
deb http://mirrors.aliyun.com/debian/ buster main non-free contrib
deb http://mirrors.aliyun.com/debian/ buster-updates main non-free contrib
deb http://mirrors.aliyun.com/debian/ buster-backports main non-free contrib
deb-src http://mirrors.aliyun.com/debian/ buster main non-free contrib
deb-src http://mirrors.aliyun.com/debian/ buster-updates main non-free contrib
deb-src http://mirrors.aliyun.com/debian/ buster-backports main non-free contrib
deb http://mirrors.aliyun.com/debian-security/ buster/updates main non-free contrib
deb-src http://mirrors.aliyun.com/debian-security/ buster/updates main non-free contrib
EOF
- 删除企业源 - For PVE 6.x
rm -rf /etc/apt/sources.list.d/pve-enterprise.list
- 下载秘钥 - For PVE 6.x
wget http://mirrors.ustc.edu.cn/proxmox/debian/proxmox-ve-release-6.x.gpg -O /etc/apt/trusted.gpg.d/proxmox-ve-release-6.x.gpg
- 添加国内源 - For PVE 6.x
echo "deb http://mirrors.ustc.edu.cn/proxmox/debian/pve buster pve-no-subscription" >/etc/apt/sources.list.d/pve-install-repo.list
apt update -y && apt dist-upgrade -y
PVE 7.x:
- 设置 debian 阿里云源 - For PVE 7.x
cat > /etc/apt/sources.list <<EOF
deb http://mirrors.aliyun.com/debian/ bullseye main non-free contrib
deb http://mirrors.aliyun.com/debian/ bullseye-updates main non-free contrib
deb http://mirrors.aliyun.com/debian/ bullseye-backports main non-free contrib
deb-src http://mirrors.aliyun.com/debian/ bullseye main non-free contrib
deb-src http://mirrors.aliyun.com/debian/ bullseye-updates main non-free contrib
deb-src http://mirrors.aliyun.com/debian/ bullseye-backports main non-free contrib
deb http://mirrors.aliyun.com/debian-security/ bullseye-security main non-free contrib
deb-src http://mirrors.aliyun.com/debian-security/ bullseye-security main non-free contrib
EOF
- 删除企业源 - For PVE 7.x
rm -rf /etc/apt/sources.list.d/pve-enterprise.list
- 下载秘钥 - For PVE 7.x
wget http://mirrors.ustc.edu.cn/proxmox/debian/proxmox-release-bullseye.gpg -O /etc/apt/trusted.gpg.d/proxmox-release-bullseye.gpg
- 添加国内源 - For PVE 7.x
echo "deb http://mirrors.ustc.edu.cn/proxmox/debian/pve bullseye pve-no-subscription" >/etc/apt/sources.list.d/pve-install-repo.list
apt update -y && apt dist-upgrade -y
6.3 / 6.4 / 7.0 / 7.1 去掉未订阅的提示
sed -i_orig "s/data.status === 'Active'/true/g" /usr/share/pve-manager/js/pvemanagerlib.js
sed -i_orig "s/if (res === null || res === undefined || \!res || res/if(/g" /usr/share/javascript/proxmox-widget-toolkit/proxmoxlib.js
sed -i_orig "s/.data.status.toLowerCase() !== 'active'/false/g" /usr/share/javascript/proxmox-widget-toolkit/proxmoxlib.js systemctl restart pveproxy
配置DNS,解决无法上网的问题
- 阿里云公共DNS
vi /etc/resolv.conf
:d9999
nameserver 223.5.5.5
nameserver 223.6.6.6
- 重启网络服务
service networking restart
安装并设置NTP服务
PVE 6.x:
参考https://pve.proxmox.com/wiki/Time_Synchronization
- 新增阿里云的公共NTP地址
mv /etc/systemd/timesyncd.conf /etc/systemd/timesyncd.conf_bak
echo [Time] >> /etc/systemd/timesyncd.conf
echo NTP=ntp1.aliyun.com ntp2.aliyun.com ntp3.aliyun.com ntp4.aliyun.com ntp5.aliyun.com ntp6.aliyun.com ntp7.aliyun.com >>    /etc/systemd/timesyncd.conf
cat /etc/systemd/timesyncd.conf
timedatectl set-ntp true
timedatectl status
PVE 7.x:
参考:https://help.aliyun.com/document_detail/187016.html?utm_content=g_1000230851&spm=5176.20966629.toubu.3.f2991ddcpxxvD1#title-ik2-31x-dso
- 新增阿里云的公共NTP地址
vim /etc/chrony/chrony.conf
新增下面的server
# Aliyun NTP
server ntp1.aliyun.com minpoll 4 maxpoll 10 iburst
server ntp2.aliyun.com minpoll 4 maxpoll 10 iburst
server ntp3.aliyun.com minpoll 4 maxpoll 10 iburst
server ntp4.aliyun.com minpoll 4 maxpoll 10 iburst
server ntp5.aliyun.com minpoll 4 maxpoll 10 iburst
server ntp6.aliyun.com minpoll 4 maxpoll 10 iburst
server ntp7.aliyun.com minpoll 4 maxpoll 10 iburst
关于img镜像导入
1.上传img镜像到pve的ISO镜像,文件目录是 /var/lib/vz/template/iso
2.将上传的img导入虚拟机 命令:qm importdisk 100 /var/lib/vz/template/iso/openwrt.img local-lvm (其中需要注意的是 100 是虚拟机的编号,后面是上传的img镜像的路径)
3.到虚拟机的“硬件”配置页面,编辑导入的硬盘进行挂载即可。
关于win下的virtio网卡的驱动
PVE下安装windows时需要的驱动程序下载
1:可以通过访问页面找到download the latest stable 点击下载
https://pve.proxmox.com/wiki/Windows_VirtIO_Drivers
2:可以通过下面的链接直接下载